Using a VPN is an obvious solution when you are connected to internet on an untrusted network. Instead of paying a subscription to a VPN service, I decided to create my own VPN server. It turns out that this is much simpler than I expected.
In this article, I briefly explain what is a VPN and its advantages. I then explain how I built my own VPN server.

- Easily preview Mermaid diagrams
- Sequence diagrams, flowcharts, …
- Built-in editor
- Export to PDF, PNG, and SVG
- Quick Look integration
- Available on macOS, iOS, and iPadOS
- Free download on the App Store
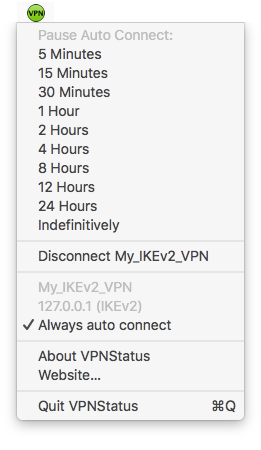
If you are interested by a VPN client, please have a look at my open source VPNStatus. It contains advanced functionalities compared to the macOS built-in VPN status menu:
- VPNStatus sources and releases: https://github.com/Timac/VPNStatus
- Blog post: https://blog.timac.org/2018/0719-vpnstatus/
What is a VPN?
When you are browsing internet from your iPhone or Mac at home, the communications go through your ISP (Internet Service Provider) via your router. Here is a simplified overview of the network:
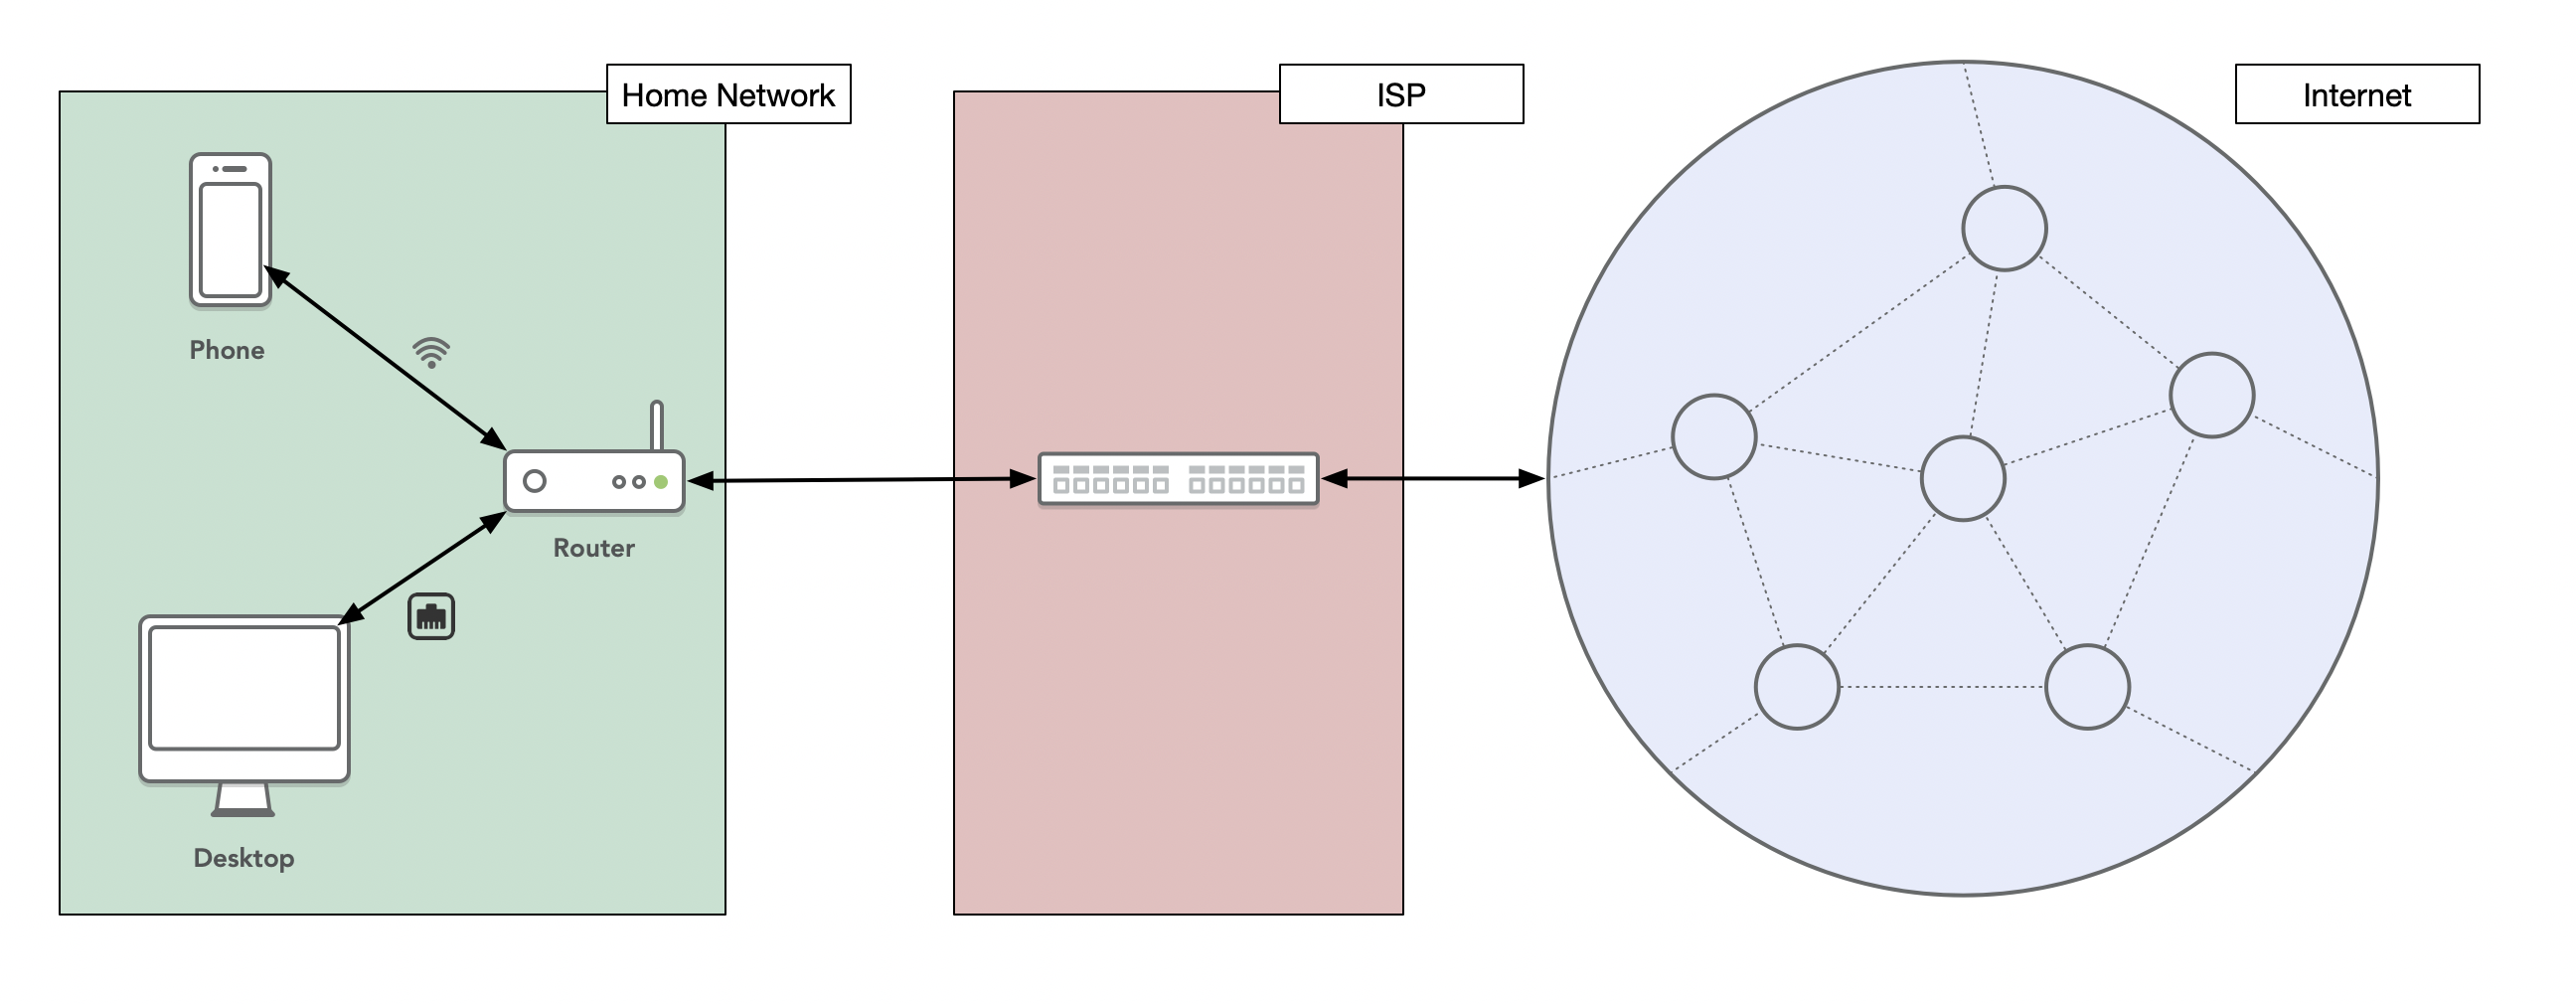
The ISP controls your internet connection, and could theoretically monitor the unencrypted data you send and receive. For an encrypted connection, like when visiting an https website, the ISP doesn’t see the data but can still see which website you visit.
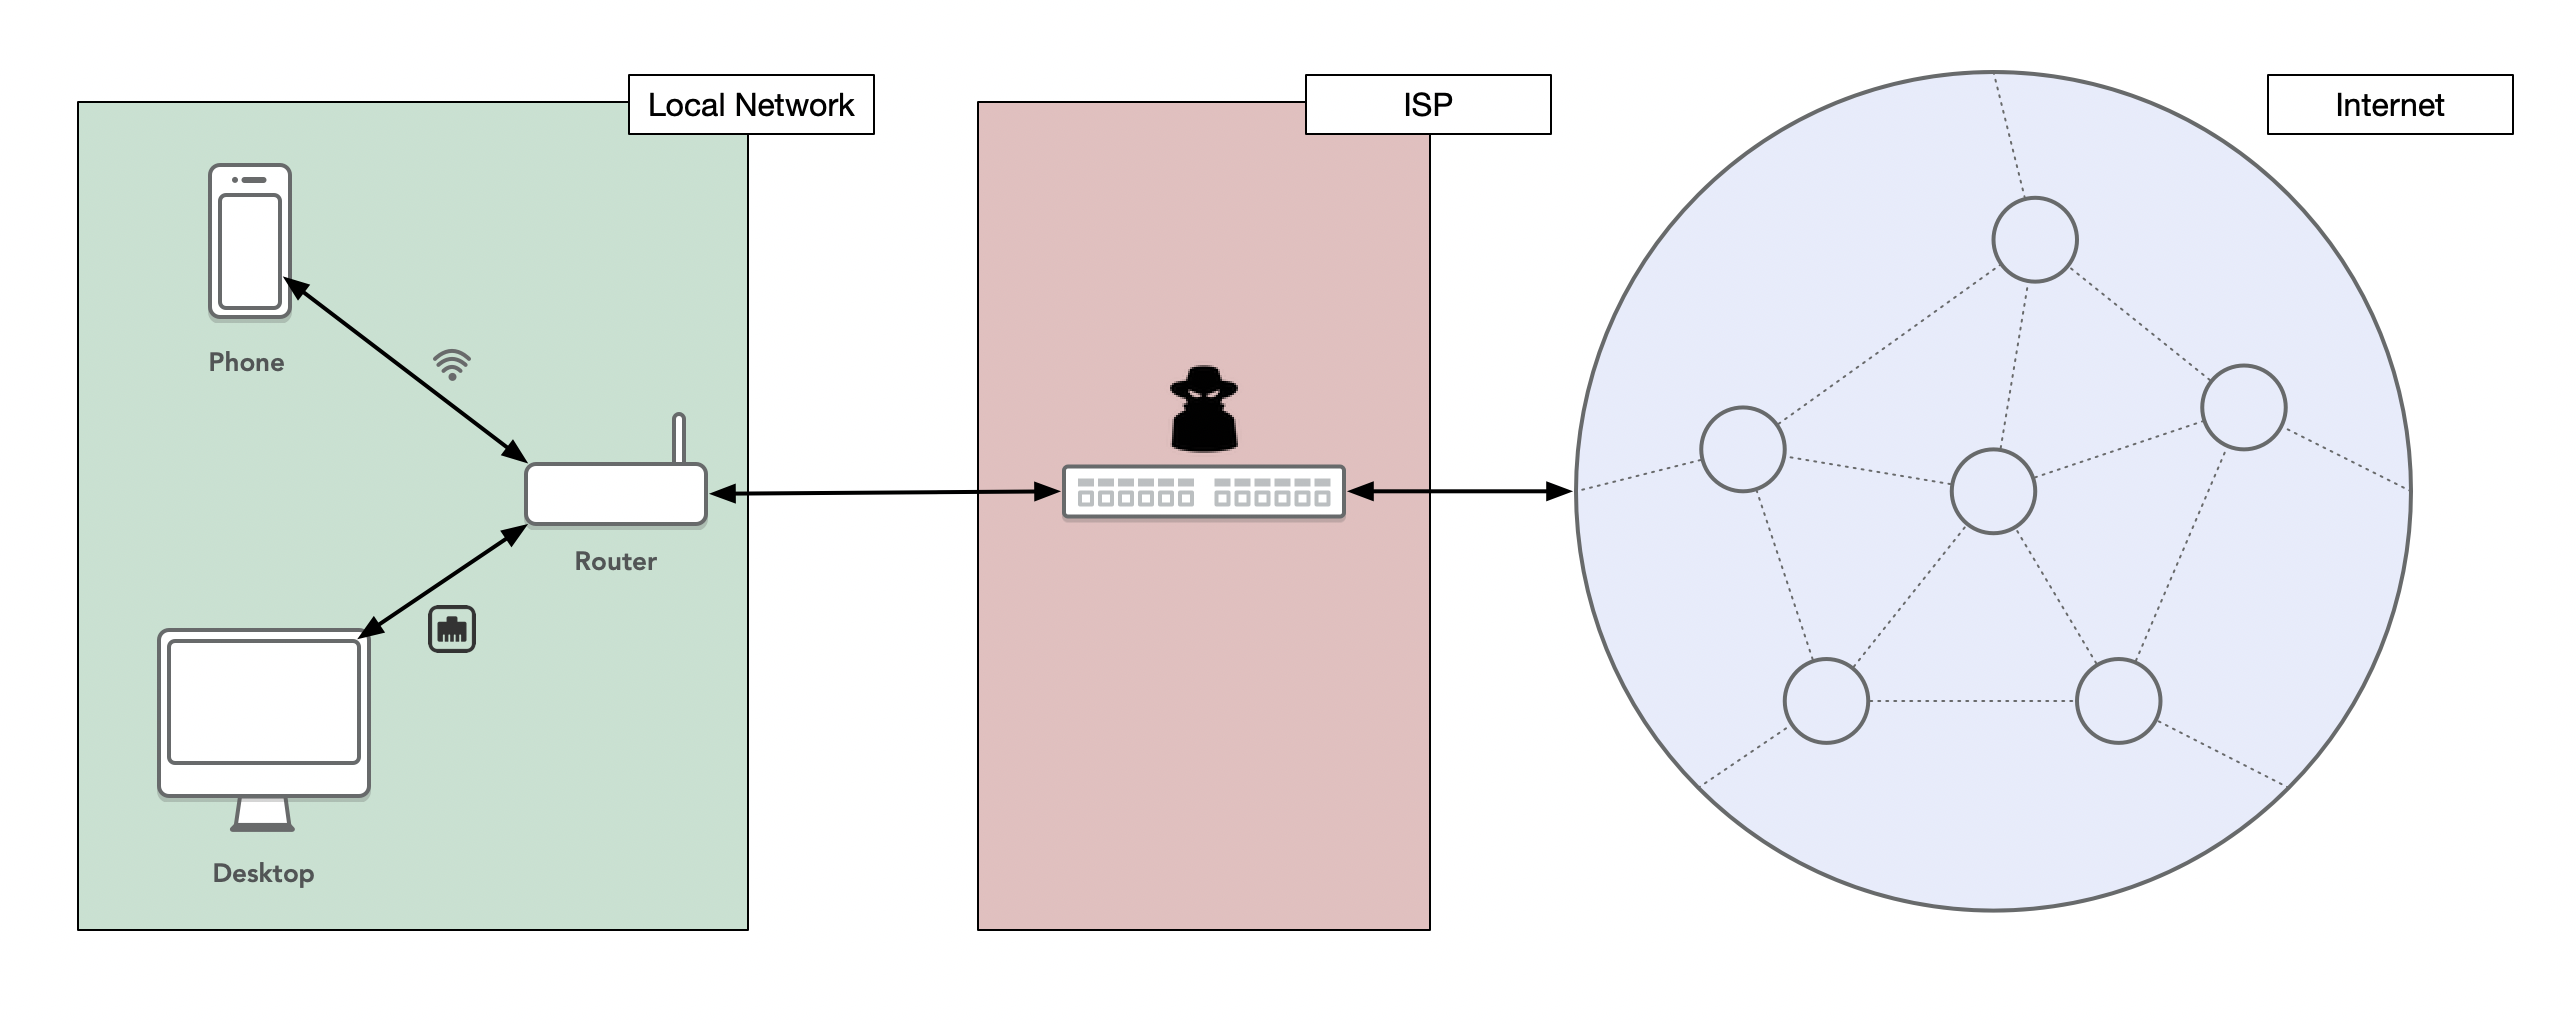
While I have no concerns about my ISP, this is a different story when I am on an untrusted network, for example when using a WiFi hotspot or when traveling. On such a network, someone could use a man-in-the-middle attack to monitor the traffic:
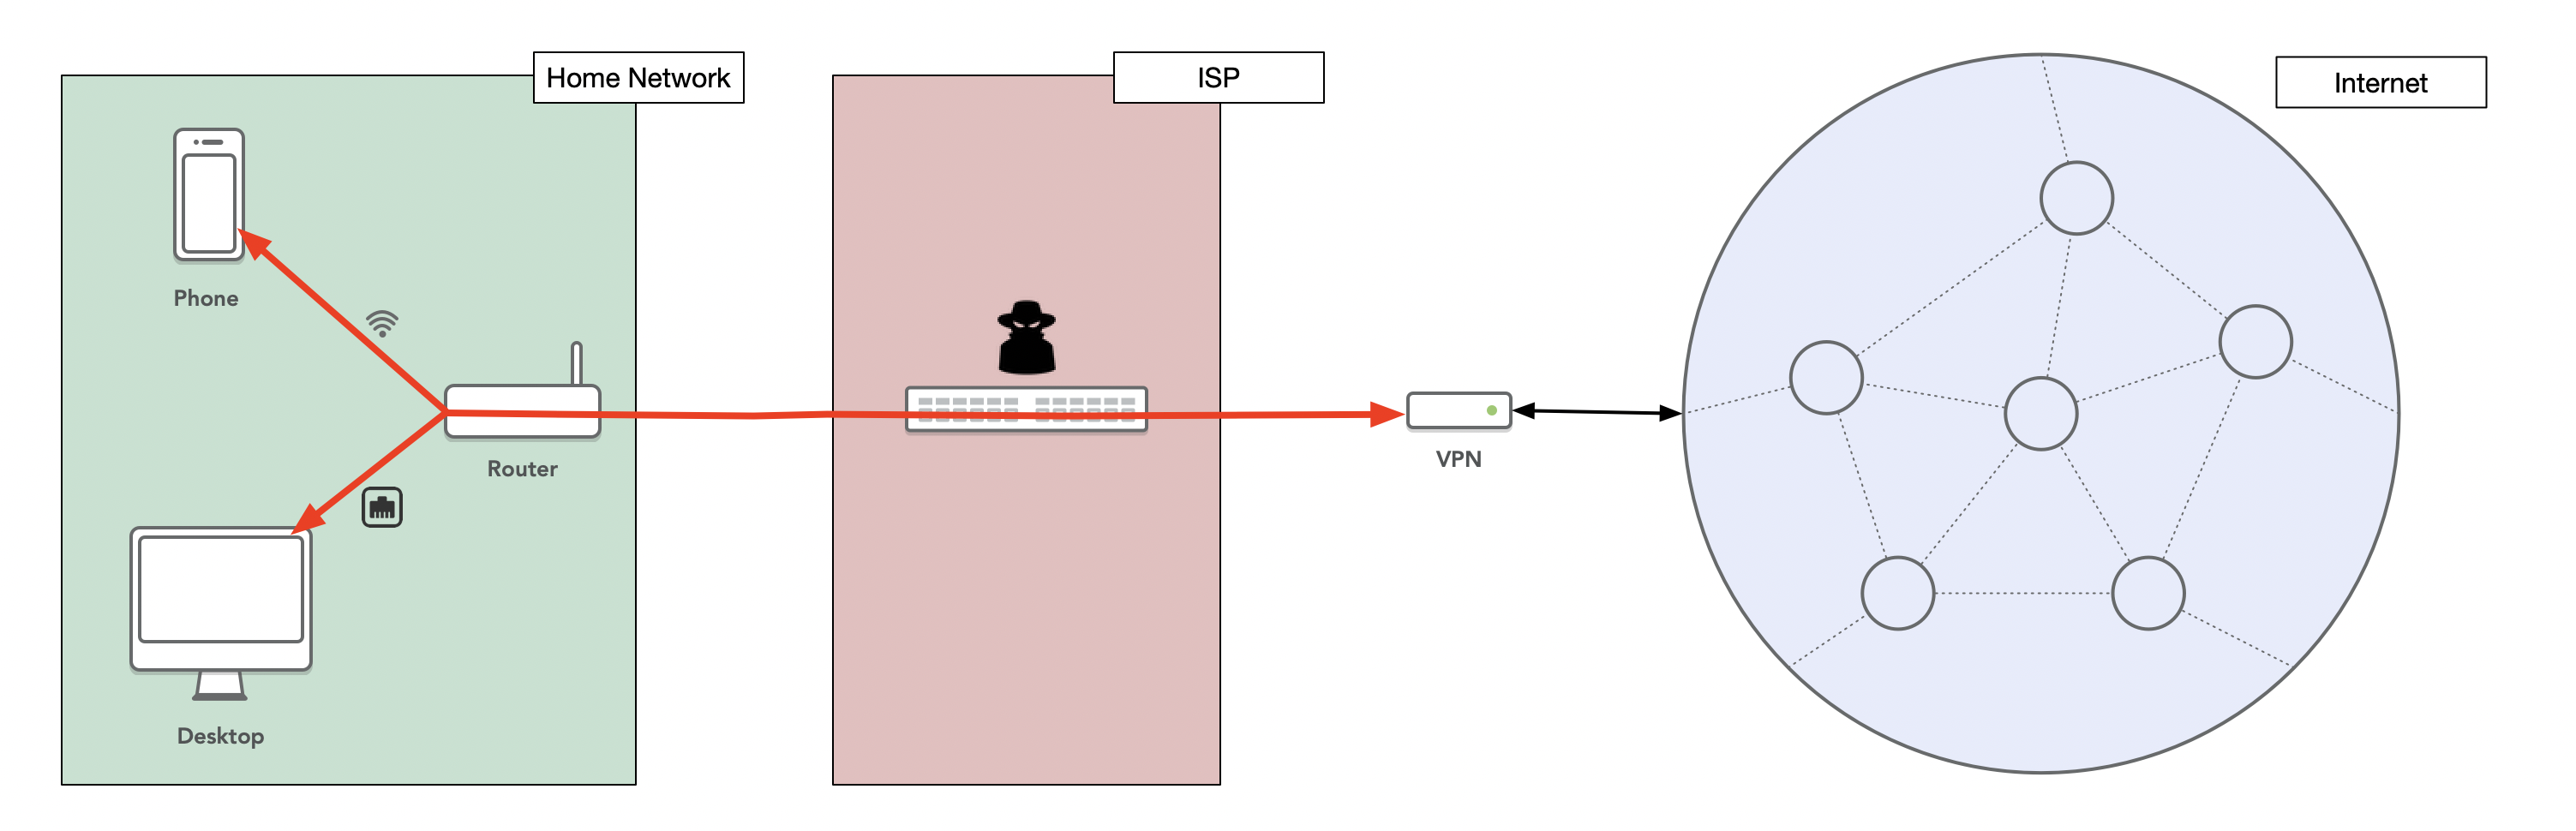
A VPN, or Virtual Private Network, is a technology that allows you to create a secured and encrypted connection - often referred as a tunnel - between your computer and a VPN server. While you are connected to a VPN, all the network communications pass through the tunnel, and nobody can see the traffic until it exits the tunnel and enters the public internet. This will protect your communication on an unsecure or untrusted network. The following graph gives an overview of the network when using a VPN. Note that the red line between the devices and the VPN server corresponds to the encrypted communication that can’t be monitored:
Advantages of a VPN
Now that we explained what is a VPN, we can see some obvious advantages:
- Since all the traffic going from your device to the VPN server is encrypted, a VPN protects the communications on an unsecure or untrusted network.
- Because the traffic going through the ISP is encrypted, a VPN lets you access websites that are blocked by the ISP.
- Another advantage of the VPN is that your device will appear on the internet with the IP address of the VPN server instead of your own IP address. This could be used to bypass Geo-IP filtering, for example when a website blocks visitors from certain countries.
- Also if you have multiple devices around the world connected to the same VPN, they would all act as if they were on the same network. This is useful to securely gain access to resources of other machines.
- On the other hand, a VPN doesn’t necessarily make you anonymous on the internet. If you are the only user of a VPN server, then the IP address of the VPN could be used to track you as if it was your own IP address. But if a lot of users are using the same VPN, then your identity will be hidden in the mass of users. This will make it harder for advertisers to track you.
Why not subscribing to an existing VPN service?
There are a couple of available VPN service providers. The free providers have either a lot of limits or have dubious privacy policies.
There are also some commercial VPN service providers. However even for these services the privacy policies are not always unambiguous. Some providers seem to log connection information and overall the security of these services is not clear. Why would you subscribe to a VPN provider if the security is worst than using your regular connection?
Finally the price from a well-known provider is approximatively $10 per month. How much would it cost to build your own VPN server?
What I needed
As we have seen, a VPN has several benefits. Depending on what you are doing, you might be interested specifically by one aspect more than others. In this chapter I describe what I needed. If you want to build your own VPN but have different needs than mine, you might want to use a different solution.
So here is the list of features I wanted:
- Simple to use on the client side, i.e. native iOS and macOS support
- Secure
- Reliable
- Fast
- Support for an unlimited number of devices
- No bandwidth limits
- Resonable costs
- Own static IP
- Always running
- Hosted outside of my home
- Simple to maintain
There are other features I don’t really need:
- Multiple IP addresses or locations
- Ads blocker
- Anonymity
- While the client side should be simple to set up, installing and configuring the VPN server could be complicated, I am not scared by that.
A server with a good performance/price ratio
Since I wanted the VPN server to be always running and outside of my house, I needed to find a server at an affordable price. I ended up taking a VPS or Virtual Private Server from OVH. Their VPS SSD 1 offer is perfect at an affordable price of 2.99€/month. In the US, you would get it for $3.35/month:
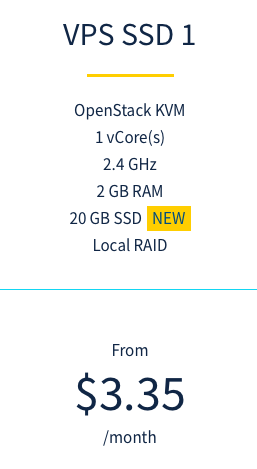
Here are the specs of the VPS:
- 1 vCore @ 2.4 GHz
- 2 GB RAM
- 20 GB SSD
- Bandwidth 100 Mbps - Unlimited traffic
- 1 IPv4 and 1 IPv6 included
- SLA 99.95%
- Anti-DDoS protection
If you want to get more information about the OVH VPS offers, you can use the following links:
- US: https://www.ovh.com/world/vps/
- France: https://www.ovh.com/fr/vps/vps-ssd.xml
- Germany: https://www.ovh.de/virtual_server/
Setting up the VPS
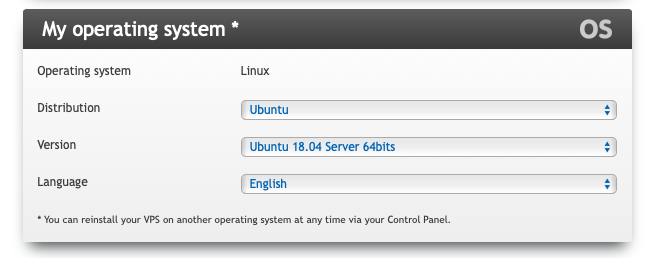
The initial VPS setup is really simple using the OVH dashboard.
I installed Ubuntu 20.04 Server 64bits, we will see later why:
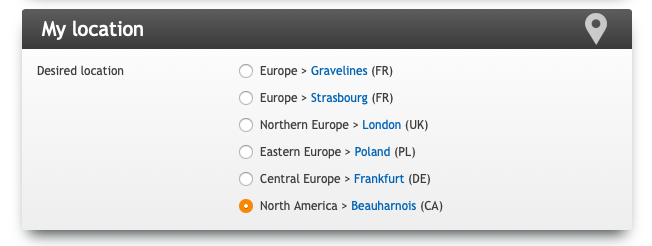
You can also pick the location of the VPS, which determines the IP address:
Once the server is initialized, you can connect using ssh: ssh root@xxx.xxx.xxx.xxx
Please don’t forget to:
- Change the root password by running
passwd - Update the Ubuntu packages
sudo apt update
Algo VPN
For the VPN server, I decided to use Algo VPN which is perfectly described in its README:
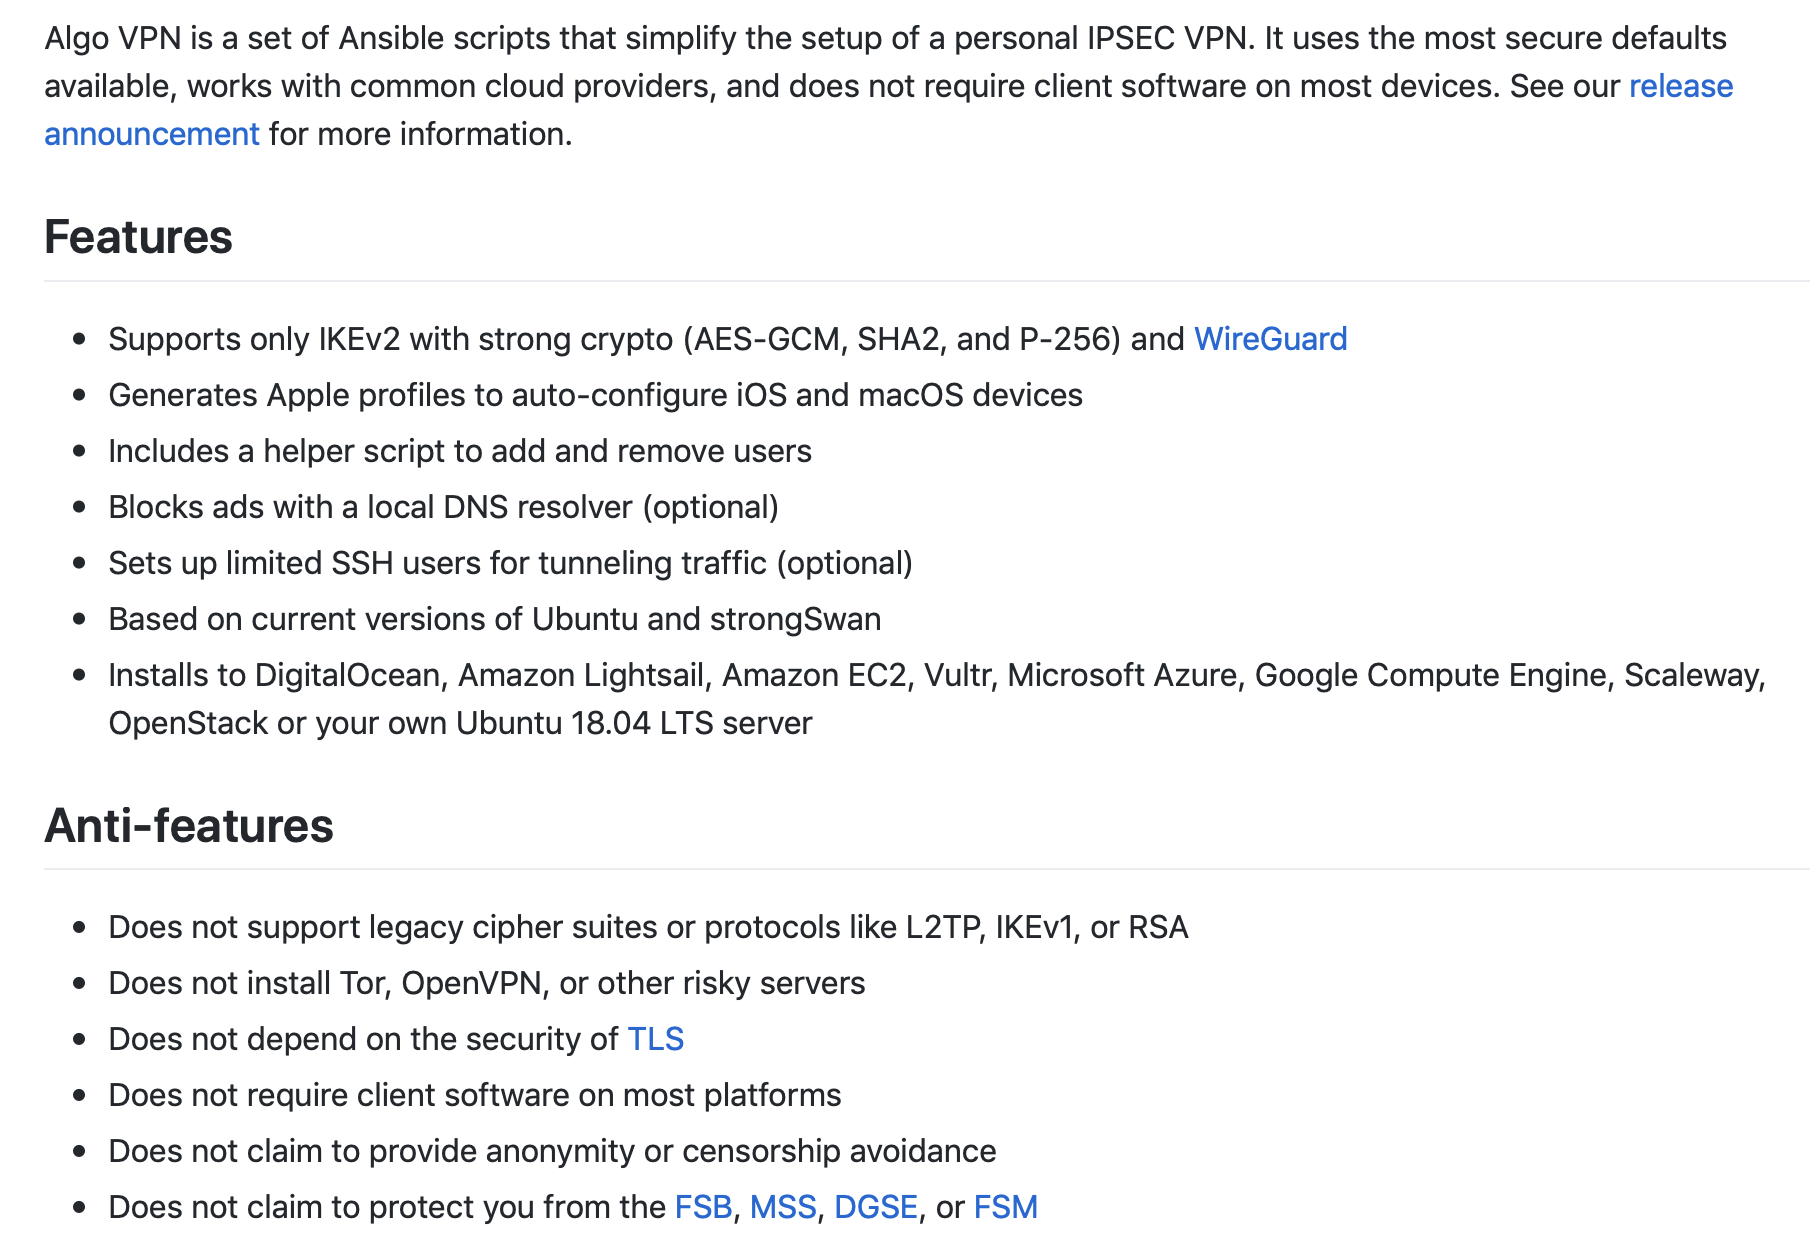
As you can see, it fulfills perfectly my needs. It is simple to use on the client side, seems secure by only supporting IKEv2 with strong crypto. It can be installed on your own Ubuntu 20.04 LTS server. And it even supports an ads blocker which I didn’t really need.
Installing Algo VPN
Installing Algo VPN for Ubuntu 20.04 server is really simple by following the steps described here:
Get a copy of Algo
git clone https://github.com/trailofbits/algo.gitcd in the algo folder
cd algoInstall Algo’s core dependencies:
sudo apt install -y --no-install-recommends python3-virtualenvInstall Algo’s remaining dependencies:
python3 -m virtualenv --python="$(command -v python3)" .env &&
source .env/bin/activate &&
python3 -m pip install -U pip virtualenv &&
python3 -m pip install -r requirements.txt
Modify the file
config.cfgto specify the users you wish to create. You might also want to change some parameters inconfig.cfg. For examplewireguard_enabledis deployed by default but you might want to disable it.Start the deployment by running
./algoand follow the instructions.
Adding and removing users
If you chose the save the CA certificate during the deploy process, then Algo’s own scripts can easily add and remove users from the VPN server:
- Update the
userslist in youralgo/config.cfg - Open a terminal,
cdto the algo directory, and activate the virtual environment withsource env/bin/activate - Run the command:
./algo update-users
After this process completes, the Algo VPN server will contain only the users listed in the config.cfg file.
You will need to download the mobileconfig files generated for each user and send this file to the user that want to use the VPN:
scp -r root@xxx.xxx.xxx.xxx:algo/configs/xxx.xxx.xxx.xxx/ipsec/apple/username.mobileconfig .
Installing the VPN access on your devices
Now that the VPN server is running, and the users have been added, setting up the VPN on the client side is simple.
iOS
- Get the
.mobileconfigfile via Airdrop - Install the profile
That’s it! In the Settings.app, you will now see a switch to enable the VPN:

macOS
- Get the
.mobileconfigfile - Double-click on the
.mobileconfigfile and enter the.p12password that Algo VPN provided.
Note that on macOS, it is not possible to auto connect to an IKEv2 VPN service. But you can use VPNStatus, an application I developed, that replicates some functionalities of macOS built-in VPN status menu. This application supports auto connecting to an IKEv2 VPN service. It is free and open source:
Credits
- Algo VPN: https://github.com/trailofbits/algo
- OVH VPS SSD 1: https://www.ovh.com/world/vps/
- VPNStatus: https://blog.timac.org/2018/0719-vpnstatus/
- Graphics built with OmniGraffle: https://www.omnigroup.com/omnigraffle/
- Ethernet image: http://www.veryicon.com/icons/system/icons8-metro-style/ethernet-ethernet-off.html
- Spy image: http://www.softicons.com/application-icons/malware-icons-by-deleket/spy-icon

- Easily preview DOT diagrams
- Live update when editing
- Capture screenshots
- Quick Look integration
- Free download on the Mac App Store
Conclusion
It turns out that building your own VPN server is much simpler than I expected. It is also really affordable with a price of 2.99€/month without taxes. I have been using this solution for several months with no problem.
Pro:
- No need to install an app on macOS or iOS to use the VPN
- Full control of the server
- No dubious privacy policies
- Unlimited number of devices
- Fast and secure
- Resonable costs
Cons:
- You need to maintain the server by ensuring that it is always patched at all times for security holes.
- A single IP address (unless you set up multiple VPN servers with different locations). With a commercial VPN service, you could get multiple IP addresses.
- Not anonymous, but if you are concern about online anonymity, you should look at Tor.
Update 24.04.2022:
- Instructions updated for Ubuntu 20.04 LTS and the latest Algo VPN version